Google Photos on Android is a powerful app and you shouldn’t pass over. While you may want to use the pre-loaded gallery that comes with almost all Android devices, you may want to hold and put that one on the back burner. Let’s dive in the ins & out of Google Photos.
Let’s first Open the Google Photos App and tap the ≡ menu in Google Photos > Tap “Settings.” > Select “Backup & sync.” This will ensure that all the photos you’ve taken on your smartphone are backed up in the clouds in your Google account.
The first thing you’ll probably want to do on the smartphone side of things is to head to the Settings menu and turn off backups over mobile data; Tap ≡ menu > Tap “Settings.” > Select “Backup & sync.” > Make sure “Cellular data backup > Photos is “Grey”.
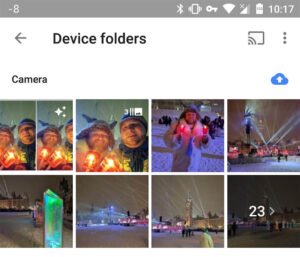
You’ll also want to backup additional photos if you have them on your device. To do so, you can do it by Tapping ≡ menu > Tap “Device folders.” this will display all the folders on your device. By tapping on the cloud in the upper right of each folder you’ll enable them to be backed up. Backed up folders will turn Blue with an up arrow.
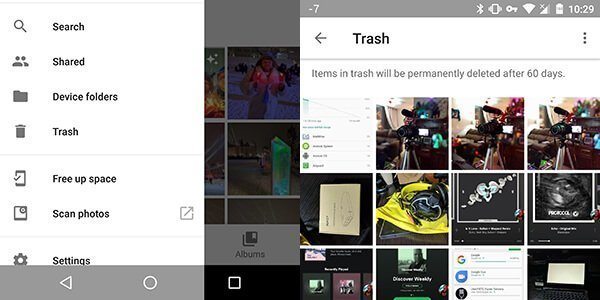
Deleted a photo by mistake did you? Selected too many items and now you’re freaking out because “OMG”. Right? Don’t panic, there’s a recycle bin similar to what you might be used to on a Windows operating system. You have 60 days to go back to that folder and recover a deleted picture. This is a very handy feature, especially if you have kids, pets or prankster flatmates at home who might accidently delete your photos. One further note of warning: if your library is synced with your phone or tablet, deleting photos or videos will also remove them from your device. You can delete images uploaded from your computer without it having any effect on the originals, though.
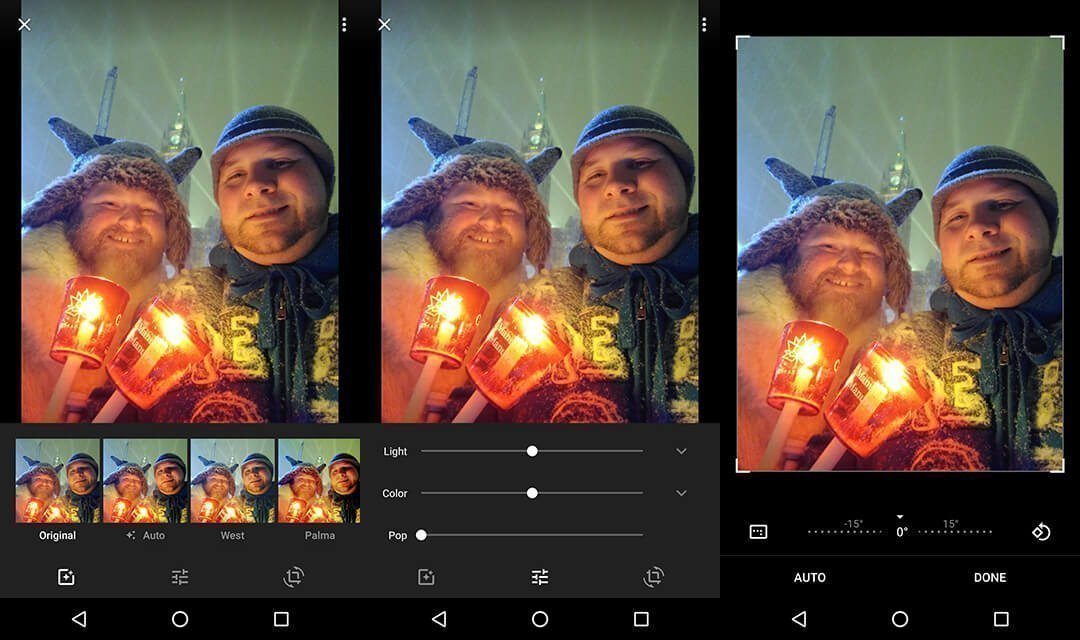
By all means, this isn’t going to compete with Photoshop when it comes to features and what you can do. Google Photos does offer some built-in tools that should be more than enough for most users. Tap use them simply select the picture you want and then tap the pencil icon and you’ll be brought over to a few selections.
The adjustments are best described as ‘basic’, but they’re easily good enough for most needs. You’ll have 3 main choices at the bottom. The first icon noted by a square with a star in the middle will allow you to do automated picture adjustment, the center option which is noted by bar with sliders on them will allow changing the lighting, colours and the pop vibrancy while the last option at the bottom noted by an icon to mimic cropping and rotating allows for just that.
The best part is that, since it’s already in the cloud, you don’t have to sync or upload the picture again.
As with everything in Google Photos, selecting images is an exercise in slick UI. Tap the tick icon and you select one. Drag across with finger or shift-click with a mouse on the desktop and you select several.
[embedyt] http://www.youtube.com/watch?v=5dxJ9Qxt2ZU[/embedyt]
Sharing them is then a simple matter of then hitting the share icon at the top. You can create and share an album via a link, create a collaborative album, and share to social media with a click.
The nifty thing that comes with using Google Photos as more and more pictures are uploaded as you either snap new pictures or upload existing ones is the video creation, the animated photos and collages that Google create on the fly.
The brilliance behind Google photos allows for multiple forms of content from mashing up a series of photos into a timelapse-style video or selecting a set of pictures that are similar to bring them up into a collage format is unparalleled. The story feature is particularly nice: it takes all pictures shot in one particular place on one particular day and groups them together under a title such as ‘Nighthowls prowling nightlife in Toronto’ (which admittedly sounds like a particularly interesting name that you’d see for a drama show on tv).
Once created, you’ll find them all lurking in the Assistant tab (top left on desktop, bottom left on mobile). You now have the option to either dismiss them, thus consigning them to digital oblivion, or save them to your Albums.
While this automation is nice and Google gets it for the most part, there’s nothing that beats the creativity of the human mind. You can go and create your own pieces.
Simply select the photos or videos you like, hit the “+” sign on the mobile app, then pick Album, Shared album, Movie, Story, Animation or Collage. Once done, sit back and let Google do its magic. My favourite is Movie; just select a group of pictures or videos and Google will automatically create a short film for you, complete with music.
[embedyt] http://www.youtube.com/watch?v=sfCgs6TcpMY[/embedyt]
The other aspect of Google Photos is the ability to recognise what the images are based on keywords. Yes, this means you can type in a search word in Google Photos and it will understand what you are looking for and it will display what’s it finds among your picture. This is due to the vast machine learning capability that Google developed. With billions of pictures in the cloud, Google Photos is able to determine that if you are searching for a date, time or a specific keyword it will return relevant pictures that you have.
One last tip for people that may be running out of storage capacity; Once you know that all your pictures are backed up on Google Photos, you should use the “Free up space” option to recover all that storage. You can Tap ≡ menu > Tap “Free up space. This will let you recover a lot of space, this is especially true if you are limited in storage capacity.
Get Google Photos on the Play store.


