Selfsafe – What is it?
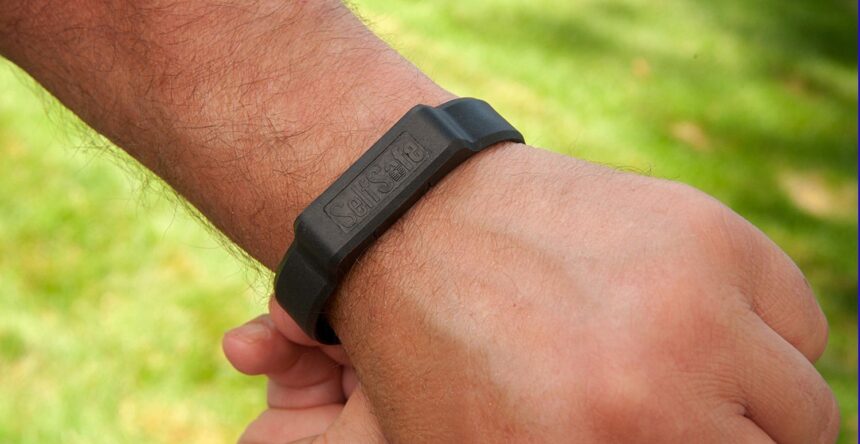
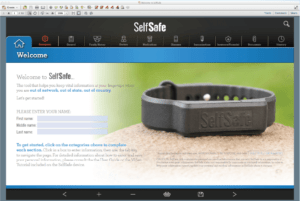
In short, it’s a USB stick built-into a wristband that’s waterproof, drop-proof, and that carries your emergency ID. The data contained is also encrypted with built-in software.
Even if it’s missing or stolen, unauthorized users will have great difficulty accessing your details with the protection provided in SelfSafe. Unlike the internet where hacking is prevalent, data breaches are common, SelfSafe is with you offline and available.
Who should use this?
- Travellers (especially international).
- Snowbirds and individuals with multiple homes.
- Athletes and sports enthusiasts who participate in activities like biking, hiking, kayaking, rock climbing, sailing, camping, cruising, cycling, racing, running, backpacking, marathons and triathlons.
- Adults or children with life-threatening ailments or allergies.
- Anyone with a chronic illness such as diabetes, cancer, and heart conditions.
- Caregivers.
- Retirement homes, nursing homes, assisted living homes.
- Seniors, disabled parents, elderly wanderers.
- Emergency responders.
- Etc.
It’s pretty easy to use. Follow their PDF guide to get you setup.
How to use it?
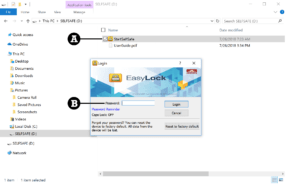
1. Plug in your to a USB port on your computer. Within the drive, double-click on the file named “StartSelfSafe”.
2. Enter the password to access. It comes setup with a default password for use when accessing the device for the first time. See Figure 1-B. Enter the password “Safety1st” in the EasyLock Login window. (Note: It is case sensitive.) Click “Login.” In the next window, read the End User License Agreement and choose “Accept” if you agree to the terms.
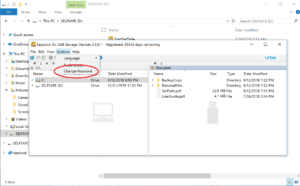
3. Changing the password. For safety reasons, it’s strongly recommended that you change the default password of your device. To do this, click on “Options” in the menu of the EasyLock navigation window, then choose “Change Password” from the dropdown menu.
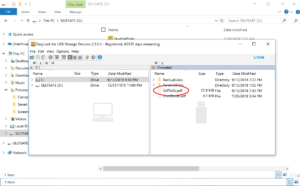
4. Open. To open It, double click on “SelfSafe.pdf,” located on the right side of the EasyLock navigation window, as shown in Figure 4. Note that an EasyLock “Attention!” window will open in the background while you work with your SelfSafe file, as shown in Figure 5. You may see it briefly before the SelfSafe application opens. Do not click “OK.” This window needs to remain open as part of the encryption feature until you are ready to close SelfSafe. See “Saving to the Device and Exiting SelfSafe” later in this guide for more information.
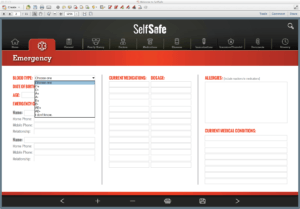
5. Enter information into. Shown on the home screen. The first thing you’ll want to do is enter your first, middle and last names in the spaces provided on the SelfSafe home screen. Take a moment to look at some of the features: Notice the tabs along the top row of the display — Home, Emergency, General, Family History, Doctors, Medications, Illnesses, and so on. You will click on these categories to enter all of your data. Finally, notice the “DELETE ALL DATA” button near the bottom of this page. You can click this button at any time to erase all of the SelfSafe data in the file and start over. CAUTION: This operation cannot be undone.
The system is easy to use and seems to be very reliable.
While I do like this approach for having emergency information on hand, I see some gaps in the system. What kind of encryption is it using, as the website makes no mention of it. Then we have the issue of you incapacitated, unresponsive, unable to talk etc. How do you communicate the password that is needed to access the encrypted file?
What will it cost?
You’re looking at $29.99 USD for the USB drive wristband. I’ll let you be the judge if this is something you’d use or consider.
Visit: https://selfsafe.net/


